Calibration: it’s how the magic happens
2025/07/04, Zoe
One of the most consistent and encouraging bits of feedback we’ve gotten is that Warhammer players want to ditch the measuring tape. It’s not like cards and dice, that add to the drama of playing the game, and make you feel more in it. This is something that’s just annoying. It takes you out of the flow, and it’s clunky. We’ve even had conversations with table-top game enthusiasts who have been too intimidated to try Warhammer because of the measuring element specifically.

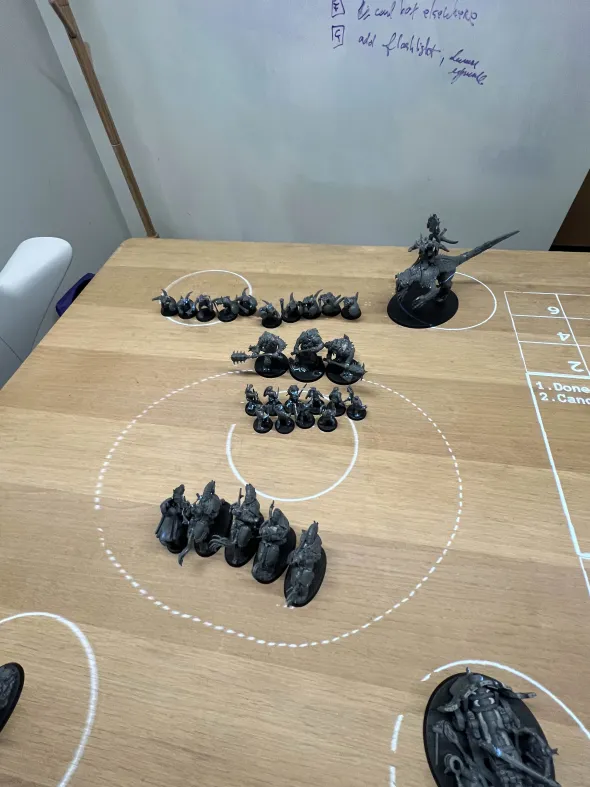
Movement range bubble. No measuring tape required!
So how do we use our device to measure and display real-world distances on the table? It all comes down to calibration. To make it work, all of our sensors and the projector need to agree on what they’re seeing. On top of that, we need a way to convert between where the device thinks a point of interest is, and where it actually is in the real world. In the case of the cameras, we can get a location in pixel space of a model, but what does that mean for the real world location of that model? How can we convert between the two? With a calibration procedure!

Device camera view.
Calibration is also what allows us to bring to life the magic of pressing a “button” on the table. The lidar projects a flat sheet of IR light just above the table, and it can detect the location of objects that block that sheet. After calibration, we can localize those objects in the real world, allowing the device to see where you point on the table.

IRL view

Device view
To bring it all together, we need to calibrate the projector so that we can send graphics to the table and ensure that they actually display correct distances. Many projectors already have some form of correction so the image doesn’t look warped, but extra correction is needed for our setup because of how close the projector is to the table. Think about when you project onto a wall from a weird angle. The picture will probably look stretched out in some places and squashed in others. We can use calibration to warp the projection back into a square image. We need to ensure that a projected movement range bubble not only goes to the correct location on the table (centered around the unit about to move), but also that it accurately displays the unit’s movement range in every direction.

Before calibration

After calibration
And that’s how the magic happens! With all the recent advancements in autonomous vehicles, we’re living in a truly exciting time for augmented reality applications. Lidar and other robotic sensors are way cheaper and more accessible now. On the software side, calibration is what actually makes these sensors useful. It’s been really encouraging to see players react so enthusiastically to the distance range bubbles that our device displays. We can’t wait for you all to see the other new features we have in the works, stay tuned!
